Build and run the Hello World dapp
In this topic, you'll build and deploy the Hello World dapp with the
Chromia Command-line Interface (Chromia CLI). Read
more about the features of the Chromia CLI in the Chromia CLI command reference section.
Prerequisite
- Install Visual Studio Code; see VS Code Installation Guide.
- Install PostgreSQL database; see Set up PostgreSQL database.
- Install Chromia CLI; see Install and configure Chromia CLI.
Run dapp in VS Code
The extension enables language features for Rell, including syntax highlighting and compilation warnings. It contributes the commands Rell: New Template Project and Rell: Invalidate index caches, which are available in the Command Palette. Once you install the extension, it's time to create a project.
-
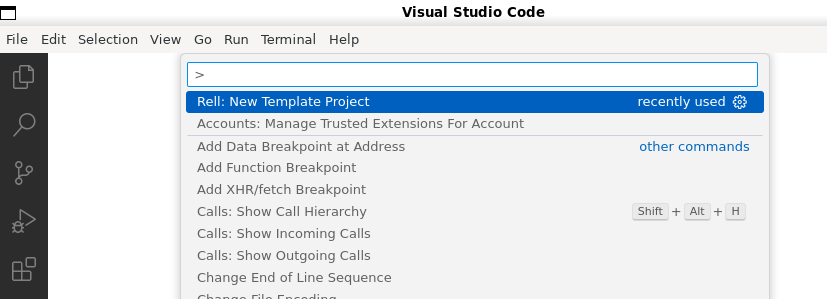
Open the Command Palette by going to the menu View - Command Palette. Type Rell: New Template Project.
-
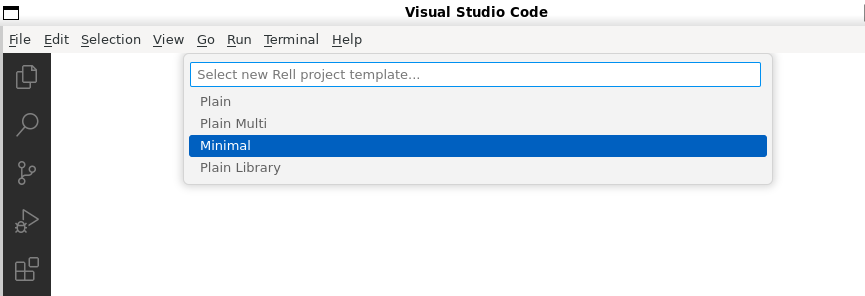
The command Rell: New Template Project asks you to select the project type from the dropdown menu. Select Minimal.
-
Next, you get
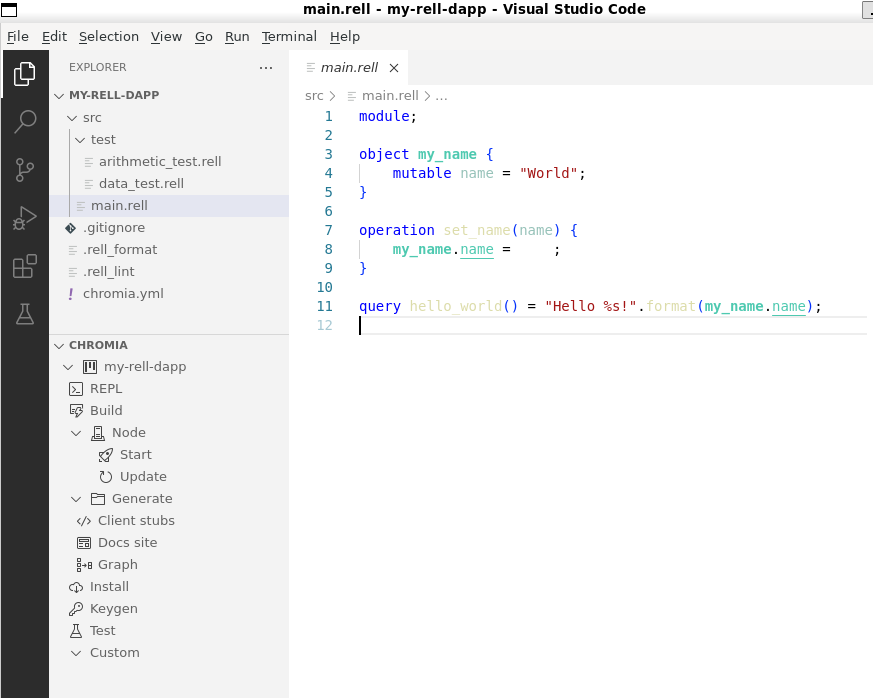
my-rell-dappas prefilled project name. Press Enter to create the project.It creates a new Rell structured project with the necessary files. A
main.rellfile, which includes theHello Worldquery and test files in thesrc/test/folder. You also have a standard configuration for your project in thechromia.ymlfile. For more information, see the project config file.noteMake sure to set the same password and username as your database instance if you didn't choose the default one from Set up PostgreSQL database. You can change this under the database attributes in the project config file.
-
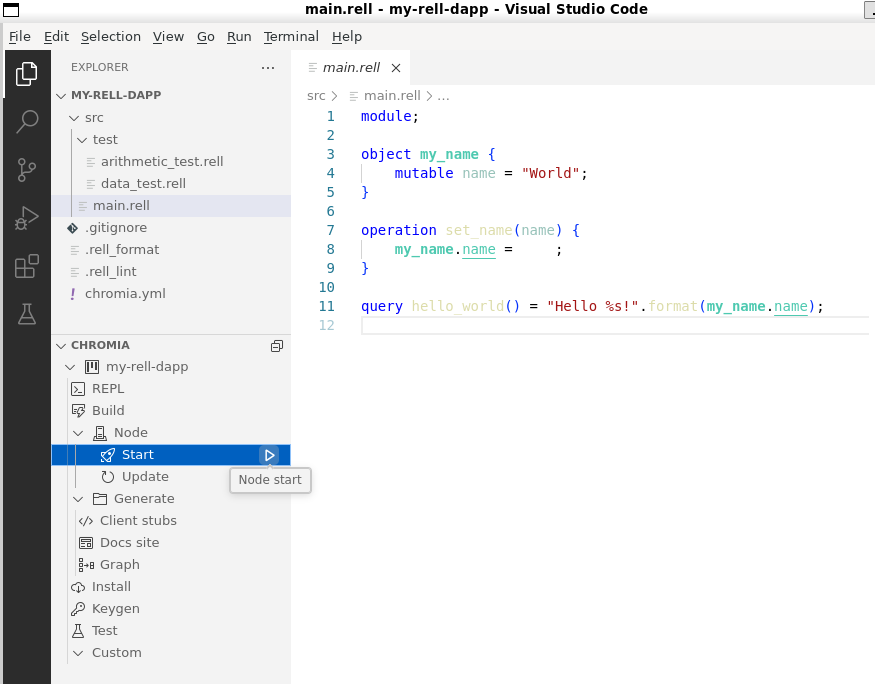
Use the
Node startcommand to start the node.infoThis command starts a node that contains your app. For more information, see Deploy your dapp to testnet or node command.
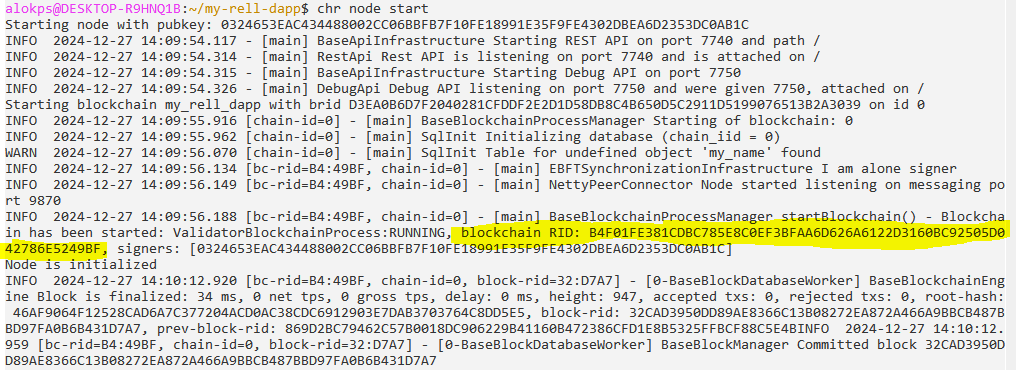
Locate the Blockchain RID in the terminal output. You need it to interact with your dapp. The Blockchain RID is the hex value following the Blockchain RID: tag. For example, see the following image.
The last step is to query your dapp and test that the backend is working correctly.
-
Write the following command in a new terminal with your project folder as the working directory. Remember to replace the
<BlockchainRID>with your Blockchain RID from the node output.curl -X GET 'localhost:7740/query/<BlockchainRID>?type=hello_world' -
The
CURLcommand requires the blockchain onlocalhostand port7740, which are the standard settings. It also calls theHello Worldquery in themain.rellfile. Your terminal should show you the following message."Hello World!"infoWriting
CURLcommands to query your backend is a safe approach, but for future queries, you might want use the query command in the Chromia CLI.
Great job. The Rell backend is up and running and works as it should. You have now run a Hello World dapp in VS Code.
Run dapp in Chromia CLI
Once you install the Chromia CLI, it's time to create a project.
-
Create the project folder in a path of your choice and use the
chr create-rell-dappcommand.chr create-rell-dappThe
chr create-rell-dappcommand creates a new Rell structured projectmy-rell-dappwith the necessary files. Amain.rellfile, which includes theHello Worldquery and test files in thesrc/test/folder. You also have a standard configuration for your project in thechromia.ymlfile. For more information, see the project config file.my-rell-dapp
|--chromia.yml
|--_src
|--main.rell
|--_test
|--arithmetic_test.rell
|--data_test.rellThe next step is to start a node and run your app locally. You can do it in a couple of different ways, but the most straightforward method we recommend is the Chromia CLI.
-
Use the
chr node startcommand to start a node. Make sure it's available in the same working directory where you have thechromia.ymlfile.chr node startThe
chr node startcommand starts a node with your applications running on it. All the blockchains listed in theblockchainskey in thechromia.ymlfile get started.blockchains:
hello: <----- This is the blockchain that starts
module: main <----- This is the entry point of the chainnoteIf you are running the node on a different URL than the default
http://localhost:7740, you can use the--api-urlto specify it.Now the node should be up, where the Rell backend is running with a local blockchain. Locate the Blockchain RID in the output of the node. You need it to interact with your dapp. The Blockchain RID is the hex value following the Blockchain RID: tag. For example, see the following image.
The last step is to query your dapp and test that the backend works correctly.
-
Write the following in a new terminal with your project folder as the working directory. Remember to replace the
<BlockchainRID>with your Blockchain RID from the node output.chr query --blockchain-rid <BlockchainRID> hello_world -
Your terminal should show you the following message.
"Hello World!"
Great job. The Rell backend is up and running and works as it should. You have now run a Hello World dapp in the
Chromia CLI.
For your next steps with Rell, feel free to follow the courses on the Chromia learning platform.
