Installation
- Pre-configured Docker
- Local environment setup
Pre-configured environment with Docker
This setup approach provides a fully pre-configured development environment using Docker and devcontainers, eliminating the need to manually install and configure individual components.
Prerequisites
Before starting, ensure you have the following installed on your machine:
- Docker: Must be installed and running
- VS Code: Visual Studio Code or a VS Code-based IDE (Cursor, Windsurf, etc.)
- Dev Containers Extension: The Dev Containers extension must be installed in your IDE
Note: This approach also works with JetBrains IDEs (IntelliJ, PyCharm, etc.), but the Ultimate edition is required for the devcontainer plugin support.
Quick Start
1. Create a new Rell dapp project
Run the following command in your terminal to create a new template project:
docker run --rm -u $(id -u):$(id -g) -v "$(pwd):$(pwd)" -w "$(pwd)" registry.gitlab.com/chromaway/core-tools/chromia-cli/chr:latest chr create-rell-dapp --devcontainer project-name
This creates a new template project named "project-name" in your current directory. If you want to use a different name,
simply change the project-name value in the command.
2. Open the project
Open the newly created project folder in VS Code.
When you open the project in VS Code and have the Dev Containers extension installed, VS Code will automatically detect that this is a devcontainer project and suggest you reopen it in a container. You'll see a notification like this:
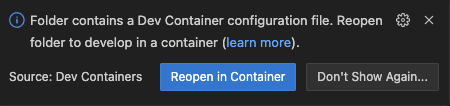
Click "Reopen in Container". This will:
- Build and start the development container
- Install all necessary dependencies
- Configure the development environment
- Provide access to all Chromia development tools
🎉 Congratulations! You're now ready to start developing!
Once the devcontainer is running, you can use the integrated terminal in VS Code to run Chromia CLI commands like
chr test, chr build, and more. The full development environment is ready to use with no additional configuration
required.
What's included
The devcontainer environment comes pre-configured with:
- Rell VsCode Extension
- PostgreSQL
- Chromia CLI
- PMC
- Proper environment configuration
Benefits
- No manual installation: All components are pre-installed and configured
- Consistent environment: Same setup across different machines and team members
- Isolated development: Development environment is completely isolated from your system
- Quick setup: Get started in minutes instead of hours
- Cross-platform: Works on Windows, macOS, and Linux
Set up PostgreSQL database
Rell requires PostgreSQL 16.3 to run a node. While the Rell IDE can function without a database, executing a node or a remote Postchain app necessitates PostgreSQL. This also applies when running and testing your dapp locally on a local node.
Default database configuration for Rell
- Database name:
postchain - User:
postchain - Password:
postchain
- macOS
- Linux
- Windows
- Docker
PostgreSQL (macOS)
-
Install Homebrew (if not already installed):
/bin/bash -c "$(curl -fsSL https://raw.githubusercontent.com/Homebrew/install/HEAD/install.sh)" -
Install PostgreSQL:
brew install postgresql@16
brew services start postgresql@16
export PATH="$(brew --prefix postgresql@16)/bin:$PATH"
createuser -s postgres -
Prepare the PostgreSQL database:
psql -U postgres -c "CREATE DATABASE postchain WITH TEMPLATE = template0 LC_COLLATE = 'C.UTF-8' LC_CTYPE = 'C.UTF-8' ENCODING 'UTF-8';" -c "CREATE ROLE postchain LOGIN ENCRYPTED PASSWORD 'postchain'; GRANT ALL ON DATABASE postchain TO postchain;"infoIf you get an error saying peer authentication failed, change the authentication method from
peertomd5in thepg_hba.conffile.
Chromia CLI (macOS)
-
Install Homebrew (if needed):
/bin/bash -c "$(curl -fsSL https://raw.githubusercontent.com/Homebrew/install/HEAD/install.sh)" -
Tap Chromia:
brew tap chromia/core https://gitlab.com/chromaway/core-tools/homebrew-chromia.git -
Install CLI:
brew install chromia/core/chr -
Verify:
chr --version
PostgreSQL (Linux)
-
Update your package manager and install PostgreSQL:
sudo apt update
sudo apt install postgresql-16 -
Start PostgreSQL and set up the database:
sudo service postgresql start
sudo -u postgres psql -c "CREATE DATABASE postchain WITH TEMPLATE = template0 LC_COLLATE = 'C.UTF-8' LC_CTYPE = 'C.UTF-8' ENCODING 'UTF-8';" -c "CREATE ROLE postchain LOGIN ENCRYPTED PASSWORD 'postchain'; GRANT ALL ON DATABASE postchain TO postchain;"
Chromia CLI (Linux)
-
Trust Chromia apt key:
curl -fsSL https://apt.chromia.com/chromia.gpg | sudo tee /usr/share/keyrings/chromia.gpg >/dev/null -
Add repo:
echo "deb [arch=amd64 signed-by=/usr/share/keyrings/chromia.gpg] https://apt.chromia.com stable main" | sudo tee /etc/apt/sources.list.d/chromia.list -
Update:
sudo apt-get update -
Install:
sudo apt-get install chr -
Verify:
chr --version
PostgreSQL (Windows)
Option 1: Using WSL (Windows Subsystem for Linux) within Windows
-
Install WSL and a Linux distribution (e.g., Ubuntu) from the Microsoft Store.
-
Open the WSL terminal and install PostgreSQL:
sudo apt update
sudo apt install postgresql-16 -
Start PostgreSQL and set up the database:
sudo service postgresql start
sudo -u postgres psql -c "CREATE DATABASE postchain WITH TEMPLATE = template0 LC_COLLATE = 'C.UTF-8' LC_CTYPE = 'C.UTF-8' ENCODING 'UTF-8';"
sudo -u postgres psql -c "CREATE ROLE postchain LOGIN ENCRYPTED PASSWORD 'postchain'; GRANT ALL ON DATABASE postchain TO postchain;"
Option 2: Using native installer (Windows 11 recommended)
-
Download the PostgreSQL installer from the official website.
-
Install the executable and add the PostgreSQL folder containing the binaries to your environment variables. Open the Windows PowerShell using
Run as administratorand run the following command, ensuring that you set the path to your binaries correctly and replace the<version>placeholder with the actual version number:setx POSTGRESQL "C:\Program Files\PostgreSQL\<version>\bin" /M -
Check if the environment variables are set correctly:
echo %POSTGRESQL% -
Open a new Windows PowerShell as normal user to make sure the environment variables are in effect. Prepare the PostgreSQL database by running the following two commands sequentially:
psql -U postgres -c "CREATE DATABASE postchain WITH TEMPLATE = template0 LOCALE_PROVIDER icu ICU_LOCALE = 'und-u-kf-upper' LC_COLLATE = 'und-u-kf-upper' LC_CTYPE = 'und-u-kf-upper' ENCODING 'UTF-8';"
psql -U postgres -c "CREATE ROLE postchain LOGIN ENCRYPTED PASSWORD 'postchain'; GRANT ALL ON DATABASE postchain TO postchain;"warningWindows native PostgreSQL installation is not recommended for production use. Depending on your Windows version, you may encounter issues related to permissions or Rell runtime errors. If this happens, use Docker setup to deploy PostgreSQL instead.
Chromia CLI (Windows)
-
Open PowerShell as Administrator and allow scripts:
Set-ExecutionPolicy -ExecutionPolicy RemoteSigned -Scope CurrentUser -
Install Scoop:
Invoke-RestMethod -Uri https://get.scoop.sh | Invoke-Expression -
Add buckets:
scoop bucket add chromia https://gitlab.com/chromaway/core-tools/scoop-chromia.git
scoop bucket add java -
Install CLI:
scoop install chr -
Verify:
chr --version
PostgreSQL (Docker)
Using Docker is a simple and reliable way to set up PostgreSQL. It avoids platform-specific issues and ensures a consistent environment.
-
Install Docker Desktop for your operating system.
-
Run the following command to pull and start a PostgreSQL container:
docker run --name postgres -e POSTGRES_USER=postchain -e POSTGRES_PASSWORD=postchain -p 5432:5432 -d postgres:16.3-alpine3.20noteWe use the Alpine version of PostgreSQL because it provides the correct collation settings by default. The
POSTGRES_INITDB_ARGSenvironment variable explicitly sets these options.POSTGRES_INITDB_ARGS="--lc-collate=C.UTF-8 --lc-ctype=C.UTF-8 --encoding=UTF-8" -
Verify that the container is running:
docker ps
Chromia CLI (Docker)
Using Docker is a great way to run Chromia CLI because it gives you an isolated, consistent environment.
Install Docker
Install Docker on your host OS:
Make sure PostgreSQL is running/configured (see section above).
Run the CLI via Docker
Run the latest CLI image and invoke chr:
docker run --rm -v "$(pwd):$(pwd)" -w "$(pwd)" registry.gitlab.com/chromaway/core-tools/chromia-cli/chr:latest chr
Database host settings when using Docker
Configure chromia.yml depending on your OS:
| Operating system | Database host configuration |
|---|---|
| macOS | Set database:host to host.docker.internal |
| Windows | Set database:host to 172.17.0.1 |
| Linux | Use --network=host in the Docker run command |
For more details, see the database section of the chromia.yml
configuration file.
Wrapper script (optional)
To avoid having to repeat the full docker run … chr prefix every time, you can use a wrapper script like the
following:
#!/bin/bash

# Allocate a pseudo-TTY when run in interactive mode
if [ -t 0 ] && [ -t 1 ] ; then TTY="--tty"; else TTY=""; fi

docker run \
  --network=host \
  -e TZ=$(cat /etc/timezone) \
  --user $(id -u):$(id -g) \
  --mount type=bind,source="/etc/passwd",target=/etc/passwd,readonly \
  --mount type=bind,source="/etc/group",target=/etc/group,readonly \
  -e SSH_AUTH_SOCK=$SSH_AUTH_SOCK \
  --volume "$SSH_AUTH_SOCK:$SSH_AUTH_SOCK" \
  --mount type=bind,source="${HOME}/.ssh",target=${HOME}/.ssh,readonly \
  --mount type=bind,source="${HOME}/.config/jgit",target=${HOME}/.config/jgit \
  --mount type=bind,source="$(pwd)",target="$(pwd)" \
  --workdir "$(pwd)" \
  --interactive ${TTY} \
  --rm \
  registry.gitlab.com/chromaway/core-tools/chromia-cli/chr:${CHR_VERSION:-latest} chr "$@"
Save the script as a file named chr, make it executable (chmod +x chr), and
put it in a folder on your PATH (for example ~/.local/bin or /usr/local/bin). On Windows you would need to adapt
the script accordingly and save it as chr.bat instead.
After that, you can run chr build, chr test, etc. without repeating the full Docker prefix. :::
IDE Plugins
Important: Be cautious when installing Chromia extensions for Cursor and Windsurf. Only install extensions from official sources and verify the publisher before installation. Malicious extensions can compromise your development environment and security.
Recommended actions:
- Verify the extension publisher is official Chromia
- Check extension reviews and ratings before installing
- Avoid installing extensions from unverified sources
- Report suspicious extensions to Chromia support
For more information about extension security, see Kaspersky's report on malicious AI extensions.
- VS Code
- JetBrains IDE
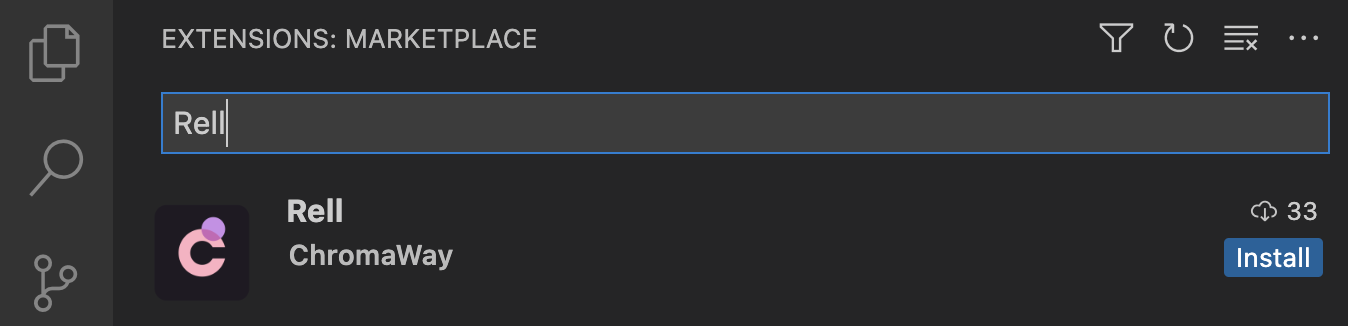
For a smoother editing experience, install the Rell extension in VS Code or a compatible IDE (such as Cursor or Windsurf).
- Click the Extensions icon in the Activity Bar on the side of VS Code or go to the menu View -> Extensions.
- Enter 'Rell' in the search box, and you should see the extension named Rell in the list.
- Press the Install button.
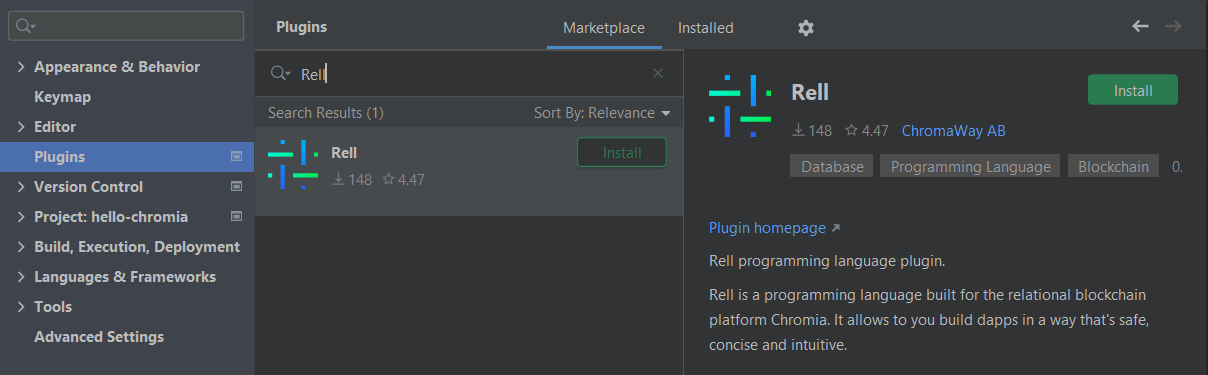
This topic contains instructions to install the Rell plugin for JetBrains IDE.
To install the Rell plugin:
- Go to the menu File -> Settings to open IDE settings and then select Plugins.
- Click the Marketplace tab and type 'Rell' in the search box, and you should see the extension named Rell in the list.
- Press the Install button.
To install a specific version, go to the plugin page in JetBrains Marketplace,
download and install it as described in
Install plugin from disk.
For example, you can do it if the most recent version of the plugin is broken.