Set up the Chromia token bridge
In this topic, you'll learn how to set up a Chromia token bridge for the Ethereum Sepolia Testnet and configure a Chromia single validator node using the Chromia CLI. Follow these steps carefully to set up the token bridge successfully.
Prerequisites
Before you begin, ensure you have the following:
- Chromia CLI
- Git
- Yarn package manager
- Install all dependencies:
yarnoryarn install - Knowledge of your Chromia validator node's public key (e.g.,
0350fe40766bc0ce8d08b3f5b810e49a8352fdd458606bd5fafe5acdcdc8ff3f57) or use the chr keygen to generate a validator node key pair. - Knowledge of the equivalent EVM address (e.g.,
0xCaf200436270A60Cda6543602F2Ea4224E31351d). You can convert a Chromia public key to an EVM address using an online tool.
Step 1: Deploy smart contract on Ethereum Sepolia Testnet
Start by
deploying a smart contract
on the Ethereum Sepolia Testnet. Use your Chromia single validator node's EVM address with the
–app option. Replace the placeholder EVM addresses with your validator node's EVM address.
Make sure to pull down the repository and install Yarn if you haven't already.
$ yarn deploy:native --network sepolia --verify --app 0xCaf200436270A60Cda6543602F2Ea4224E31351d,0x9F4daAfc3F52C1c92e4583413824523679ABc9a3,0x4cBe97487b517b66B43943AD97Ad8394b9DEa7dC,0x4FC783e3a3beF0270858Dc5FbB837fA6f8fDbFc6 --offset 2
Verify the successful deployment of the smart contract on Etherscan and make a note of the contract address for later use.
Step 2: Set up the Chromia node for the token bridge
Chromia CLI includes the postchain-eif-core module, simplifying the setup of the Chromia node for the token bridge support. Follow these steps:
- Set up a Rell development environment on your local machine.
- Clone the sample node from the repository.
Customize chromia.yml` and node config
- Update the contract address to your deployed
smart contract address (e.g.,
0x2426F34a96a8437A2E3fDE9fE2e6100fCb96495C). - Set the skip to height to match the block
number when you deployed the smart contract (e.g.,
9685581). - Prepare the node config.
Configure the
sepolia.urlskey to point to your Ethereum Sepolia JSON RPC endpoint. You can use third-party RPC node services like Infura or Alchemy for testing.
Install and start the Chromia node with token bridge support
chr install
chr node start --node-properties config/node-config.properties --wipe
YoTo override the node properties file, specify the full path to the node-config.properties file. Refer to the
node command for more details.
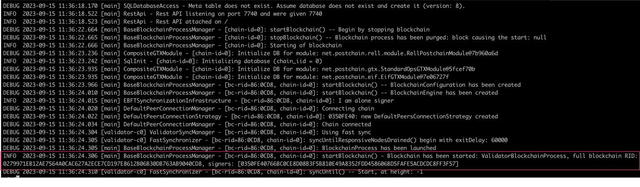
Step 3: Obtain the Blockchain RID
After your Chromia node is up and running, find the Blockchain RID in the node's output. This unique identifier is
essential for interacting with your dapp in the following steps. The Blockchain RID is a hexadecimal value following the
Blockchain RID: tag (e.g., 86D0279971EB12AE7564A0CAC627A2ECE7CD197E8612B06B30DB763AB9040CD8).
Step 4: Interact with the Chromia token bridge using the bridge client
To interact with the Chromia token bridge, follow these steps:
-
Utilize the Chromia bridge client for the token bridge.
-
See the documentation here.
Step 5: Allow user access
For users to utilize the Chromia token bridge, administrators must set up the following:
- Allow tokens to be deposited on the smart contract.
- Register assets on Chromia to be used as pegged tokens.
- Register EVM tokens on the Chromia chain.
- Map the pegged tokens and EVM tokens on the Chromia chain.
Additionally, users should create their own Chromia FT accounts to use the Chromia token bridge.